Google Play Service Account Setup: JSON Key Guide
A Service Account in Google Play Console is a crucial tool for secure app management and ASO automation.
It enables safe automation of Google Play tasks without sharing developer login credentials, allowing services to manage app data strictly within assigned permissions and perform tasks that would otherwise take hours manually.
With it, you can:
- automatically update app metadata and descriptions
- manage reviews and ratings
- retrieve analytics and reports
- handle publishing and releases
- scale ASO processes for multiple apps and accounts
The Service Account ensures access control, security, and reliable automation - which is why it is the standard for professional ASO tools and teams.
Creating
Section titled “Creating”Create or Select a Google Cloud Project
Section titled “Create or Select a Google Cloud Project”- Open the Google Cloud Console main dashboard.
- Click Select a project in the top bar.
- Choose one of the following:
Create a new project, or Select an existing project.
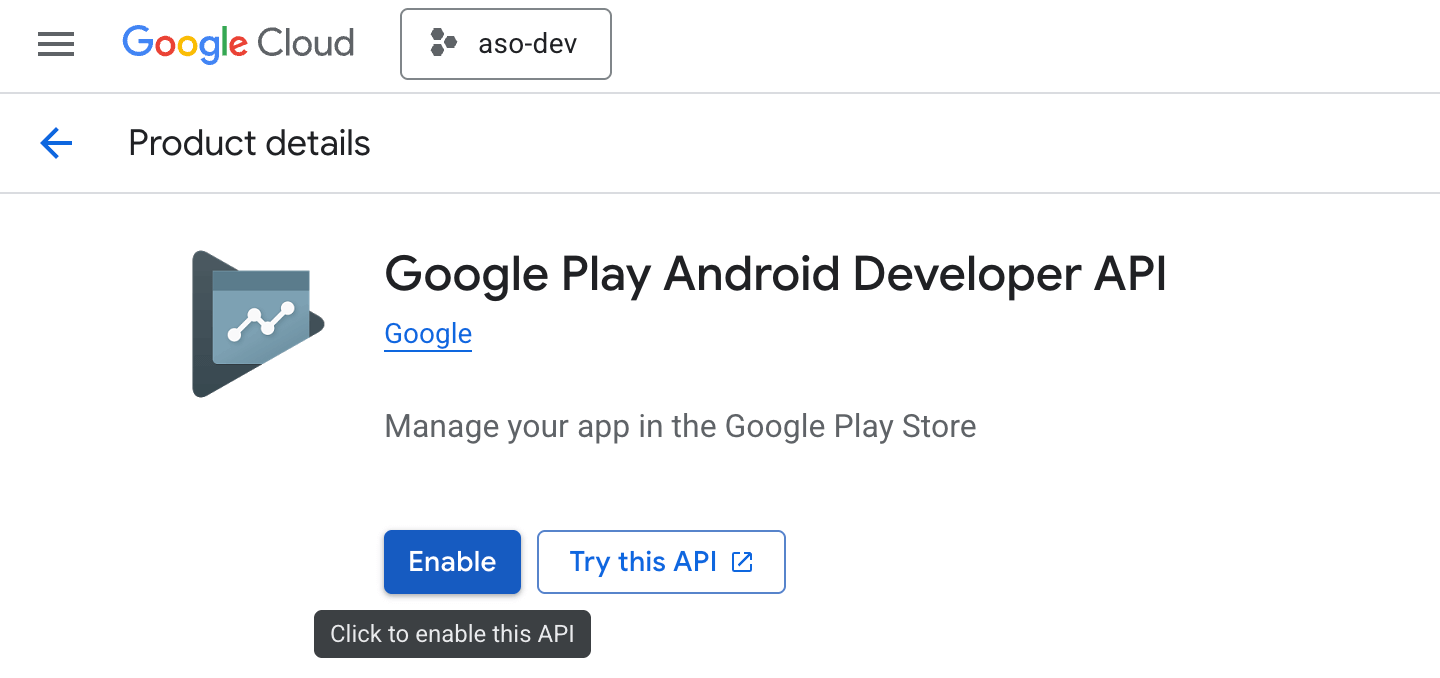
Enable Google Play Developer API
Section titled “Enable Google Play Developer API”- Open the Google Play Developer API page:
https://console.cloud.google.com/apis/library/androidpublisher.googleapis.com

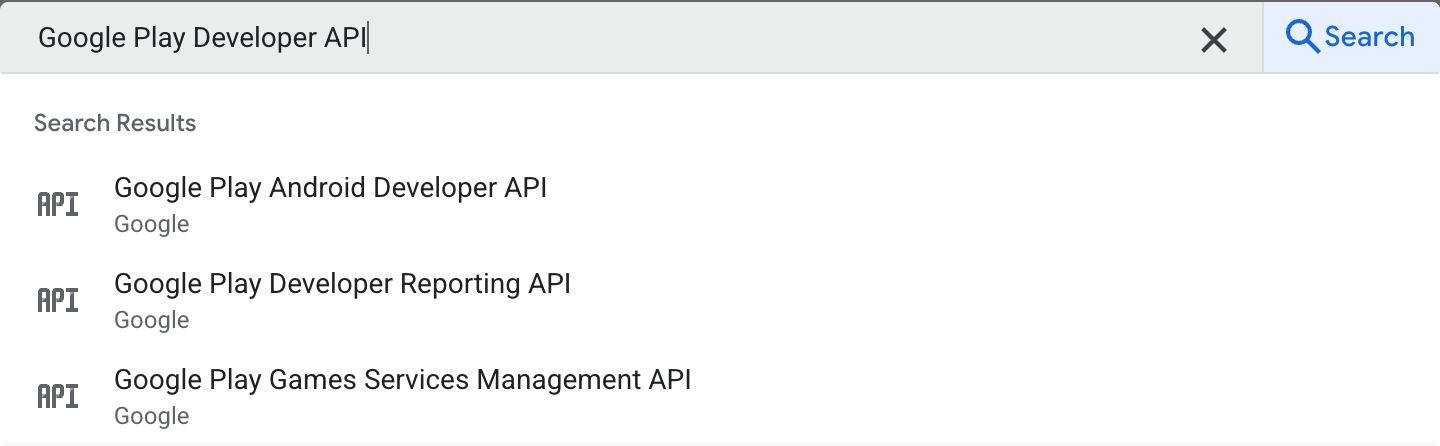
- Make sure the correct project is selected.
- Click Enable.

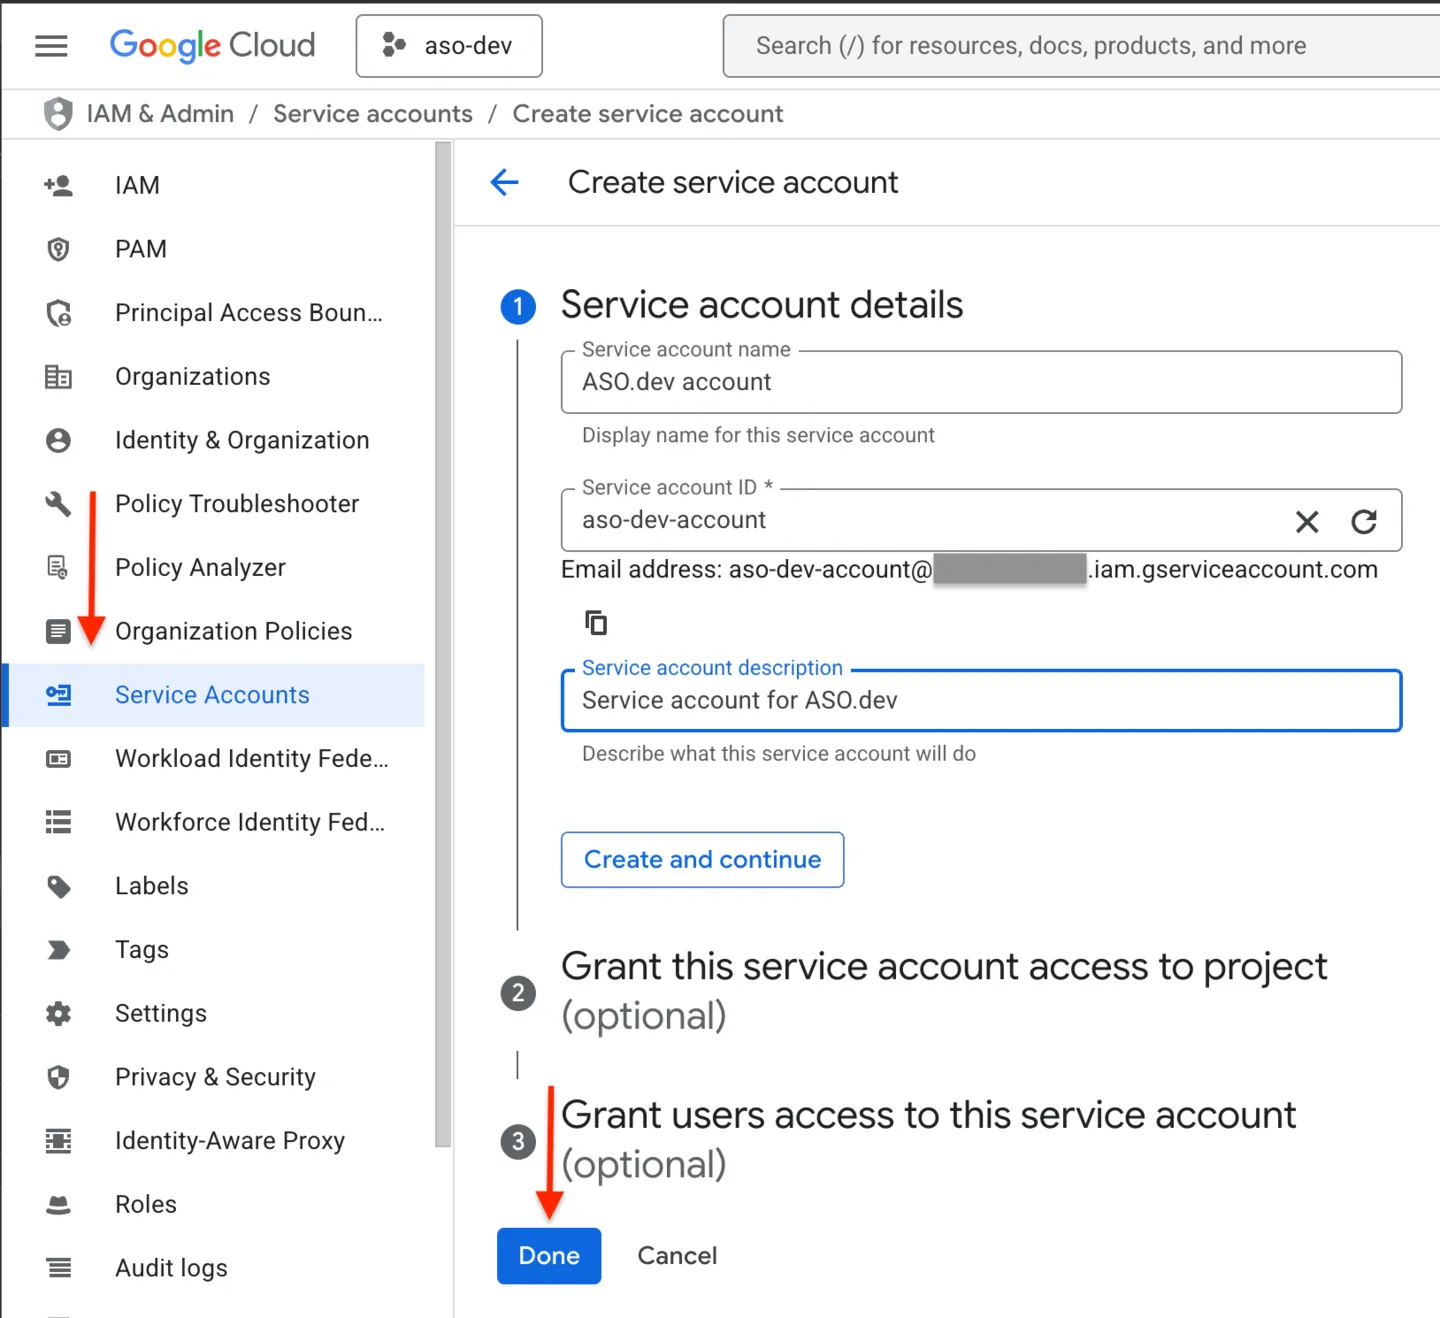
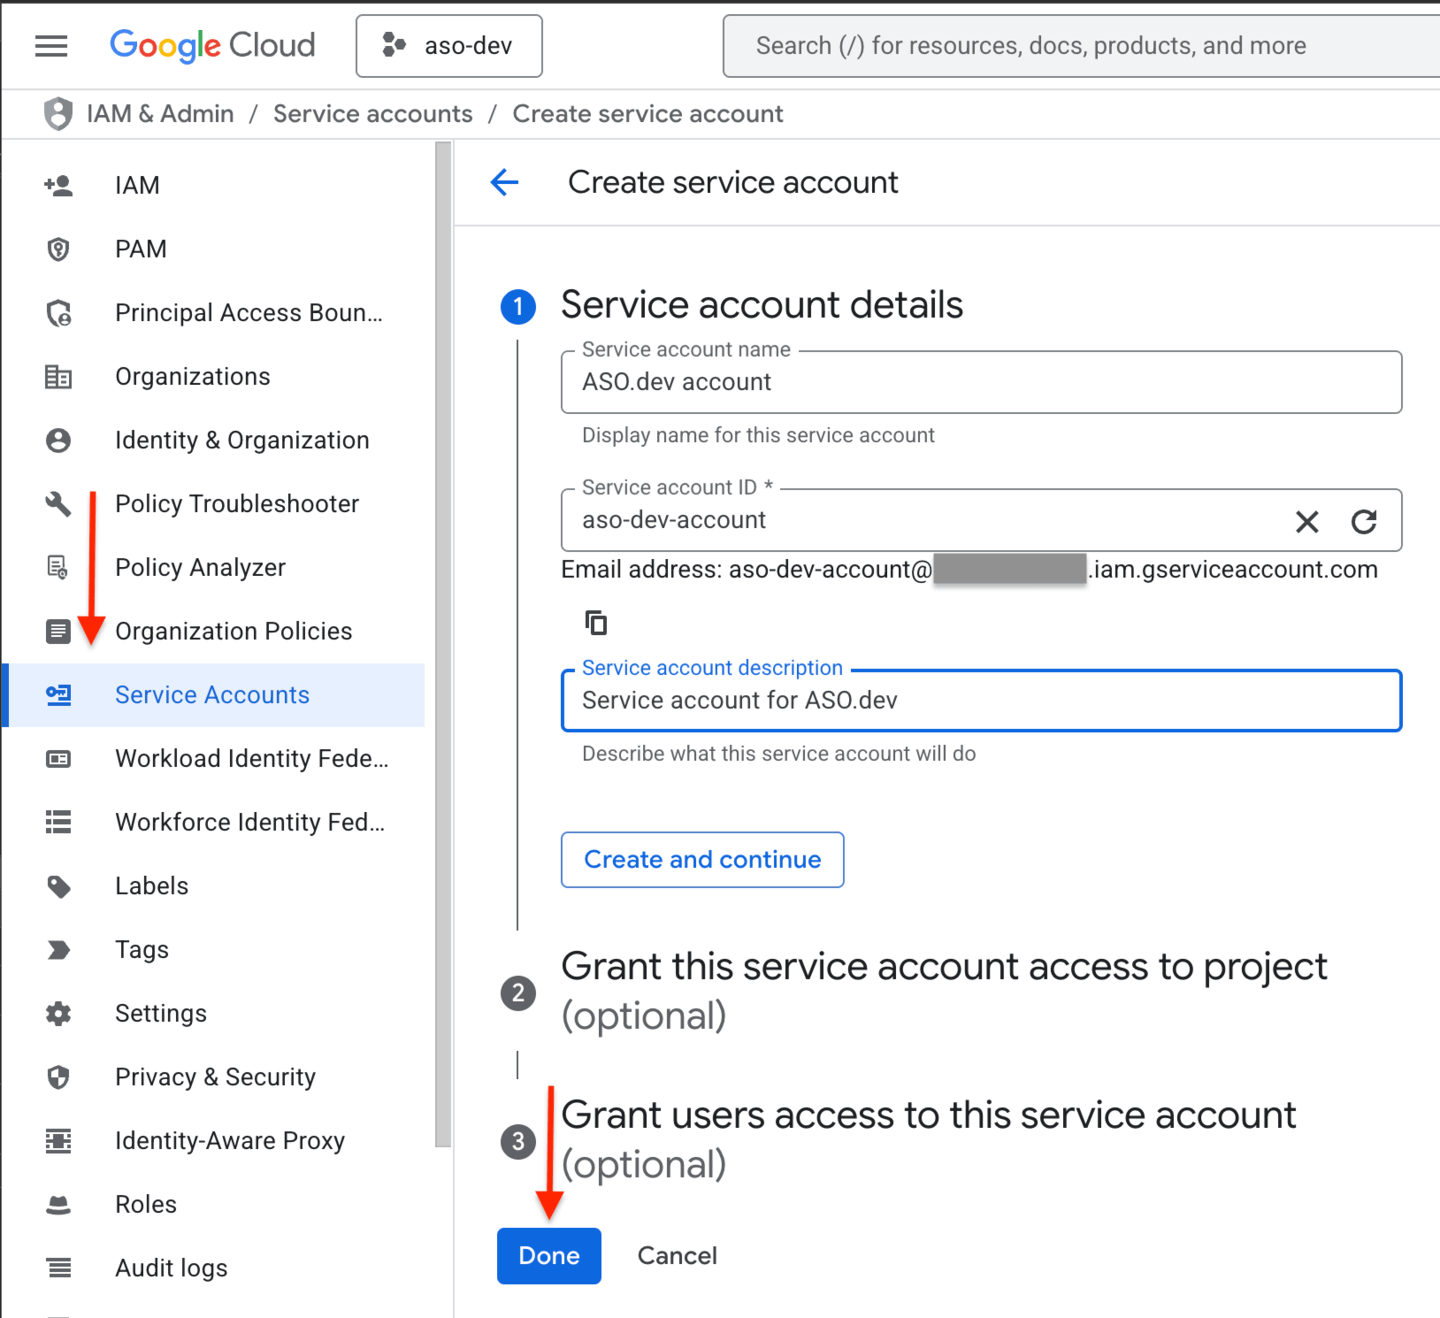
Create a Service Account
Section titled “Create a Service Account”- Go to IAM & Admin → Service Accounts in Google Cloud Console.
- Click Create Service Account.
- Fill in:
- Service account name (for example:
ASO.dev)
- Service account name (for example:
- Click Create and continue.
- Do not assign Google Cloud roles at this step (Google Play permissions will be set later in Google Play Console).
- Click Done.
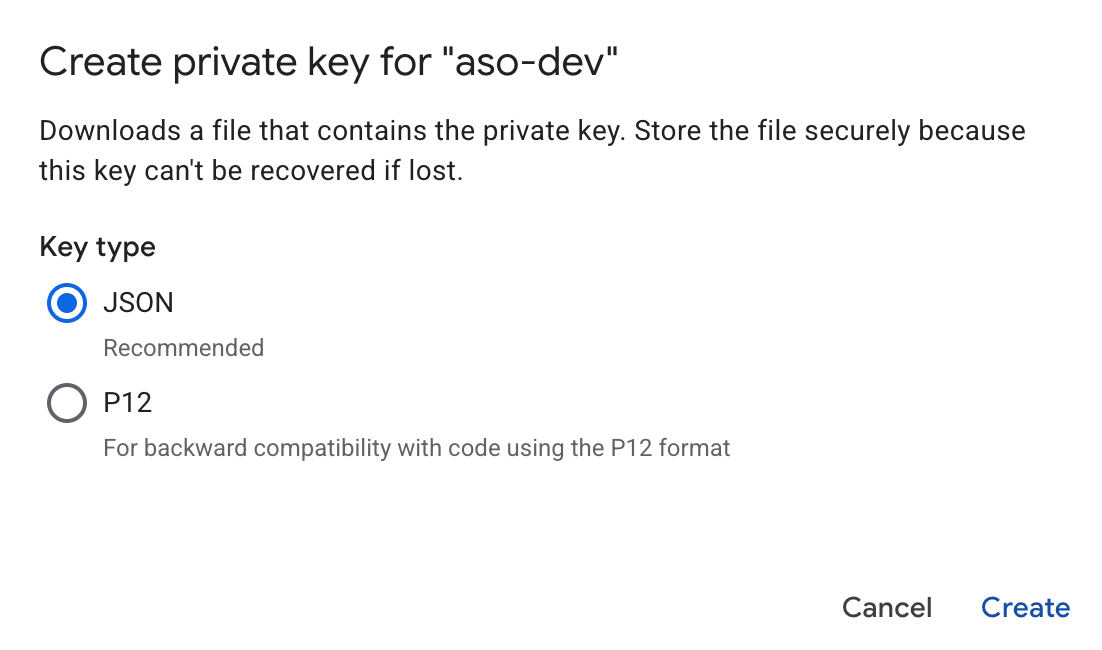
Create and Download the JSON Key
Section titled “Create and Download the JSON Key”- In the Service Accounts list, find the newly created service account.
- Click Actions (⋮) → Manage keys.
- Click Add key → Create new key.
- Select JSON format.
- Click Create and download the file.

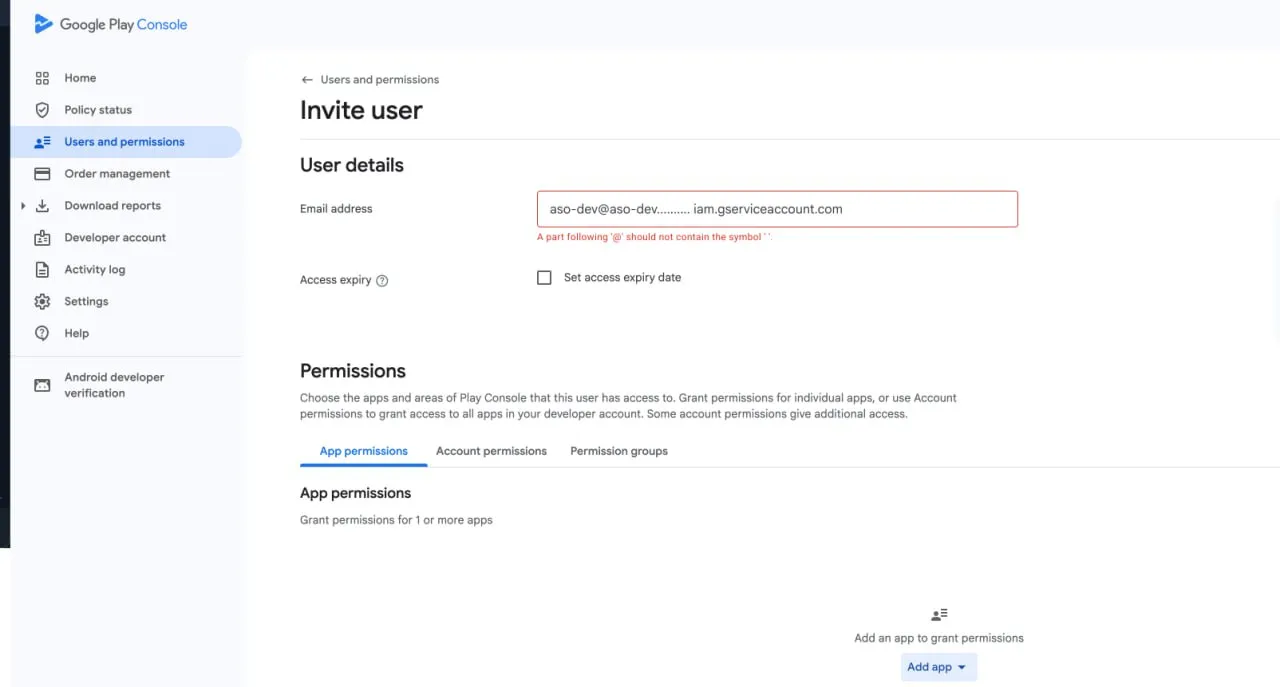
Grant Access in Google Play Console
Section titled “Grant Access in Google Play Console”- Open the Google Play Console.
- Select Users & permissions.
- Click Invite new user.
- Enter the email address of the created service account (find it in Google Cloud Console on the Service Accounts page).
- Open the App permissions tab.
- Click Add app, select the app or apps you want to grant access to, and click Apply.
- For each selected app, enable the minimum required permissions:
- View app information (read-only) - base access to the selected app.
- Manage store presence - metadata, pricing, pricing templates, in-app products, distribution, and store listing data.
- Reply to reviews - optional, only if review reply automation is needed.
- Do not enable Account permissions or access to all apps unless the service account needs it.
- Click Invite user.
- Save changes.
Next Step
Section titled “Next Step”Upload the downloaded JSON key to ASO.dev to complete the integration and start automating your Google Play workflows.
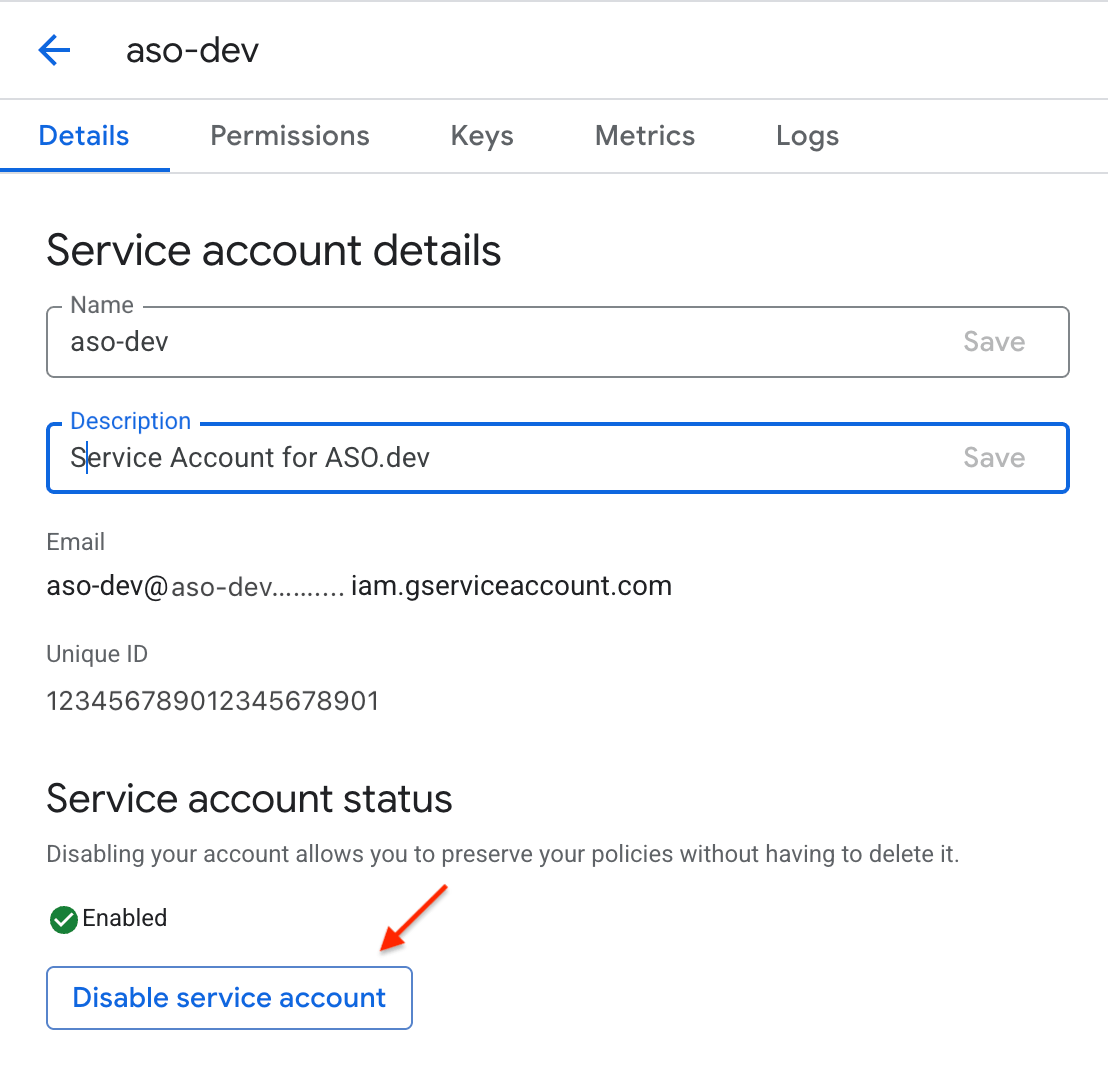
Deletion
Section titled “Deletion”Disabling the service account
Section titled “Disabling the service account”To disable (revoke access for) a service account, do the following:
- Open Google Play Console and go to Setup → API access.
- In the Service accounts section, find the service account you need.
- Click Revoke access next to it.
- Confirm the action in the dialog.
- Verify the account no longer has access (its status/access should show as revoked).

Deleting the service account key
Section titled “Deleting the service account key”If you need to delete a service account key, follow these steps:
- Open the Google Cloud Console.
- Go to IAM & Admin → Service Accounts.
- Find the required service account and click its name.
- Open the Keys tab.
- Find the key you want to delete and click Delete next to it.
- Confirm the deletion in the dialog.

